Proofreading is not an easy task. It is about the details – spelling, grammar and punctuation. Here are some tools that you can use to help ensure your work is error free.
A. Spelling and Grammar Checking
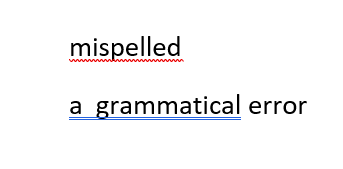
1. Turn on Spelling and Grammar Check. If there’s word that is spelled incorrectly, it will be underlined in red, as shown below. Blue underlining indicates a grammatical error. You can right click it to correct it, or you can open the Spelling window as shown here, by pressing F7. You can also click on the book icon in the blue taskbar at the bottom of the page (see red arrow).
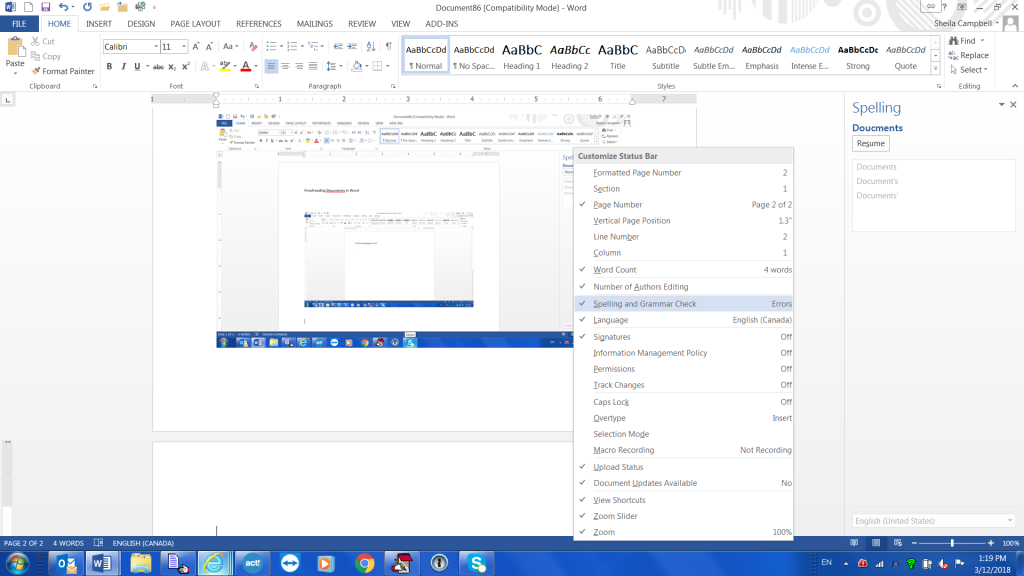
When there’s an ‘x’ in it, there are spelling or grammatical errors in your document. Make sure that spelling and grammar check are turned on.

2. Have you used a word incorrectly or spelt it incorrectly more than once in a document? Use the find and replace function. Control + F opens the Navigation sidebar. Enter the word you want to search. Then click on the down arrow in the search box. Click on replace.
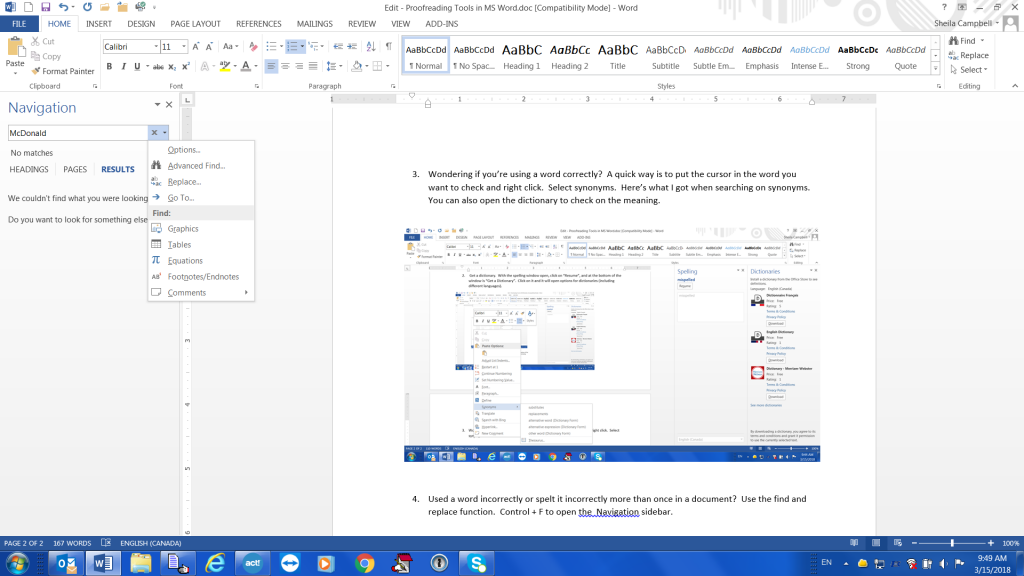
The Find and Replace window will open. Enter the correct word or spelling. You now have the option of finding the next instance and replacing them one at a time, or using “Replace All” to do the entire document.
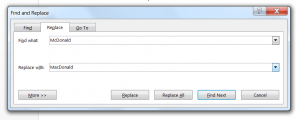
You can also use the “More” option, which is especially useful for formatting. Click on the Format button and you have multiple options.
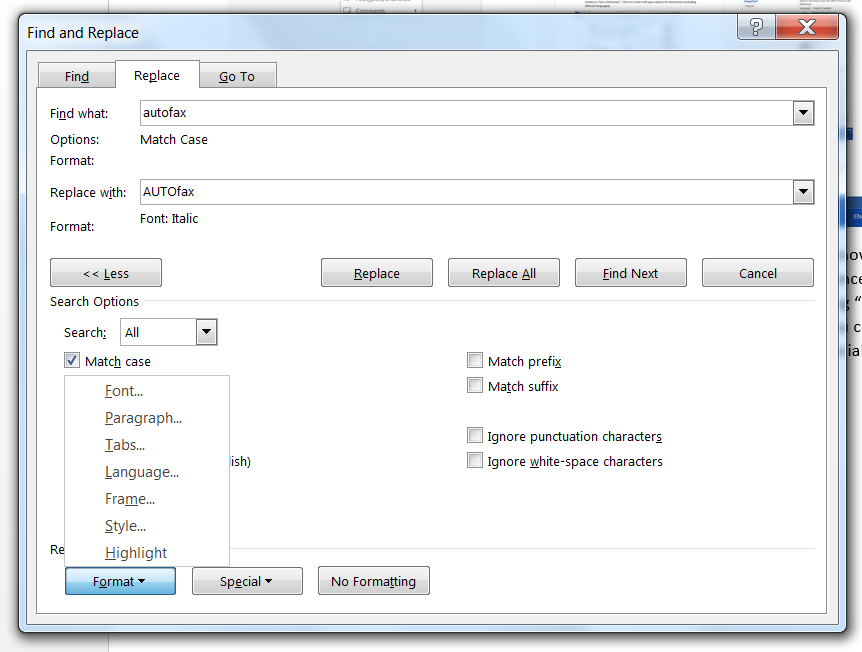
Find and Replace can also be opened from your main menu (see red arrow), if you have them selected.

B. Correct Word Usage
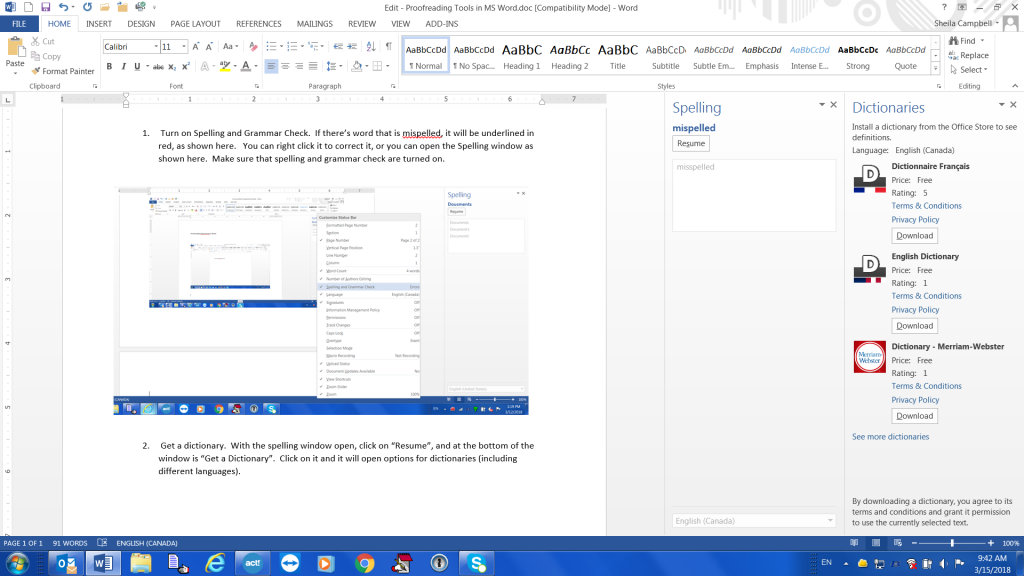
Get a dictionary! With the spelling window open, click on “Resume”, and at the bottom of the window is “Get a Dictionary”. Click on it and it will open options for dictionaries (including different languages).
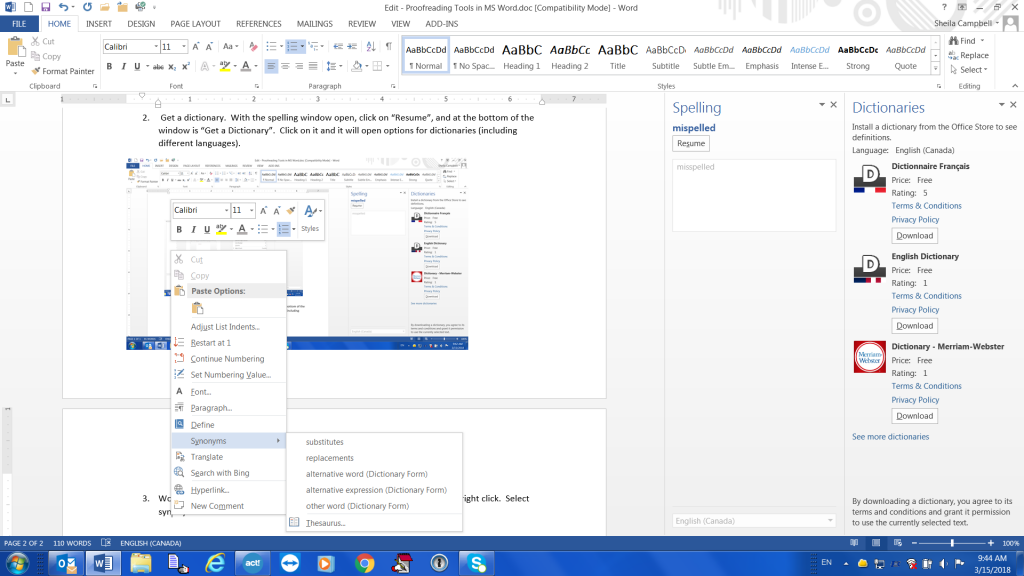
Wondering if you’re using a word correctly? A quick way is to put the cursor in the word you want to check and right click. Select synonyms. Here’s what I got when searching on the word ‘synonyms’. You can also open the dictionary to check on the meaning.
C. Formatting
For more formatting options, especially in a document with HEADINGS, try this: In the HOME tab, apply headings styles to your document. Click on the text that you want formatted as headings, and click on the heading style you want to apply.

D. Ribbon Options
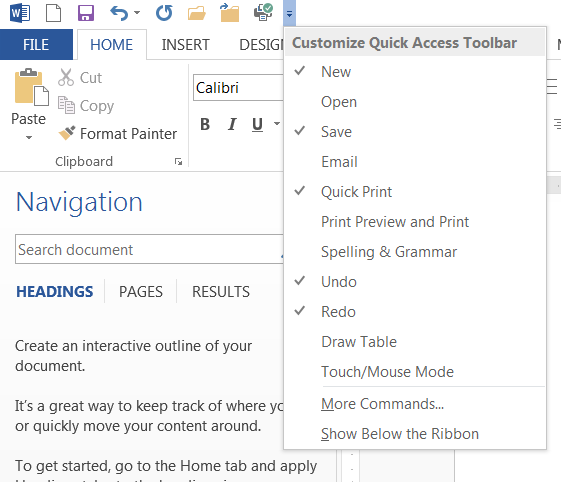
You can customize the ribbons in MS Word. To select options (or unselect them), click the ‘down’ button on the “Customize Quick Access Toolbar”. This allows you to easily open and close document options.
Want more space on the page? You can hide your ribbons by click on the ‘up’ arrow, or right clicking on the toolbar and selecting which option you want.

Restore (or hide) hidden ribbons by clicking on the “Auto Hide” button.

2Ascribe Inc. is a medical transcription services agency located in Toronto, Ontario Canada, providing medical transcription services to physicians, clinics and other healthcare providers across Canada. Our medical transcriptionists take pride in the quality of your transcribed documents. WEBscribe is our client interface portal for document management. 2Ascribe continues to implement and develop technology to assist and improve the transcription process for physicians and other healthcare providers, and recently introduced AUTOfax. AUTOfax works within WEBscribe to automatically send faxes to referring physicians when a document is signed off by the healthcare professional. As a service to our clients and the healthcare industry, 2Ascribe offers articles of interest to physicians and other healthcare professionals, medical transcriptionists and office staff, as well as of general interest. Additional articles may be found at http://www.2ascribe.com

